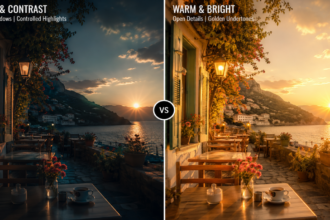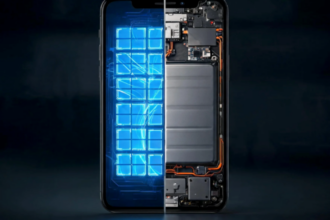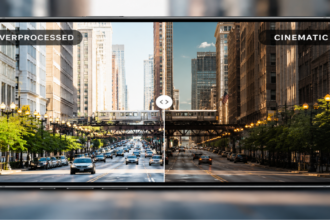



You frame the perfect shot, and everything looks completely natural on your display. However, just a single second after pressing the shutter button, the final image suddenly looks much brighter, colors shift drastically, and the overall contrast completely alters. This sudden unexpected transition is not a mechanical malfunction of your hardware system, but rather the direct mathematical consequence of algorithmic computational layers. Gaining a deep understanding of what happens in the background after you hit the shutter allows you to comprehend exactly why the camera preview vs processed photo results do not match.
- Camera Preview vs Processed Photo — Quick Comparison
- What Happens After You Press the Shutter?
- Why Your Final Photo Can Look Completely Different
- Camera Preview vs Processed Photo in Different Shooting Scenarios
- Why Smartphones Process Photos Instead of Showing the RAW Sensor Image
- Can You Reduce or Avoid Smartphone Photo Processing?
- FAQ
- Conclusion
Camera Preview vs Processed Photo — Quick Comparison
When operating any modern mobile viewfinder, the ongoing visual discrepancy between a camera preview vs processed photo represents a technical conflict between raw hardware capture and heavy software automation. The live viewfinder screen is engineered to display a continuous, low-latency video feed so the user can easily adjust composition parameters. Conversely, the finalized image file saved to your internal storage system is the end product of a massive sequence of background mathematical calculations.
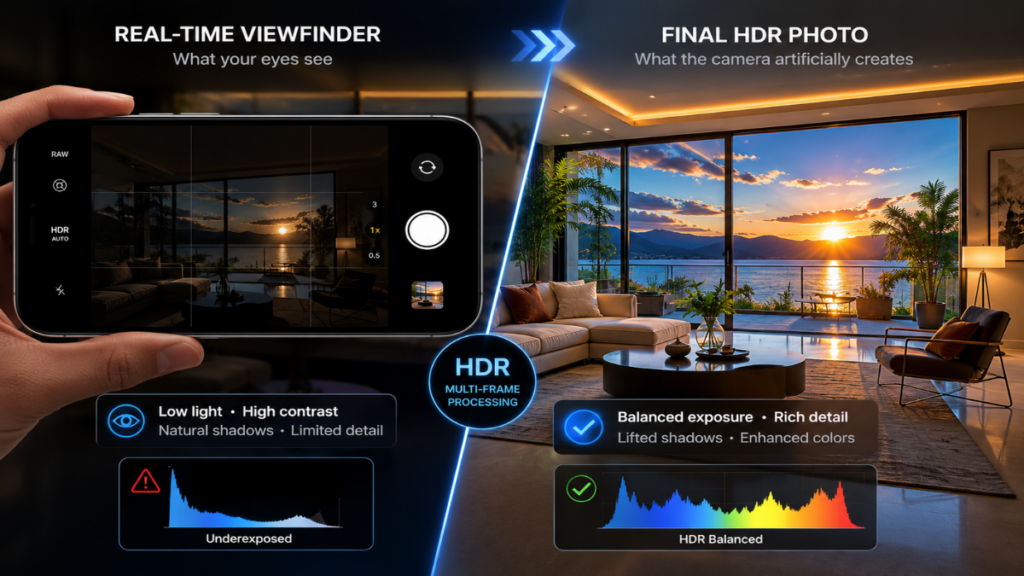
This fundamental architectural difference explains why so many mobile photographers feel deeply surprised when reviewing their recent media gallery. A natural image of an outdoor cherry blossom tree captured on a bright sunny day may look balanced during live framing, yet it transforms into a hyper-saturated digital asset later. A direct comparison of the camera preview vs processed photo stages highlights how aggressively automated features reshape your photography.
What you see before pressing the shutter
The live display screen, known as the camera preview, delivers uncompressed sensory data with almost zero operational latency. To maintain a perfectly fluid frame rate of thirty or sixty frames per second, the image signal processor cannot execute complex multi-frame algorithms or heavy layer blending. What your eyes observe during this initial stage is the closest representation of physical reality that the mobile lens can gather.
What happens after the image is processed
The exact microsecond your finger releases the shutter button, the internal smartphone camera processing framework assumes complete control over the active data stream. The mobile device does not merely record a single instant in time, but instead collects massive parallel source files to assemble a composite asset. As a result, the camera preview vs processed photo variations become immediately apparent as dynamic range, edge sharpness, and color matrices shift entirely.
Quick Feature Comparison
| Stage | Camera Preview | Processed Photo |
| Image source | Live sensor feed | Multi-frame processed image |
| HDR | Minimal | Applied automatically |
| Noise reduction | Little or none | Heavy |
| Sharpening | Minimal | Applied |
| Color adjustments | Minimal | Automatic |
| AI optimization | Limited | Active |
What Happens After You Press the Shutter?
The sudden digital transition from a live camera preview vs processed photo occurs in a fraction of a second, yet it contains hundreds of discrete logical operations. The modern era of computational photography has effectively transformed standard mobile phones into dedicated graphics supercomputers.
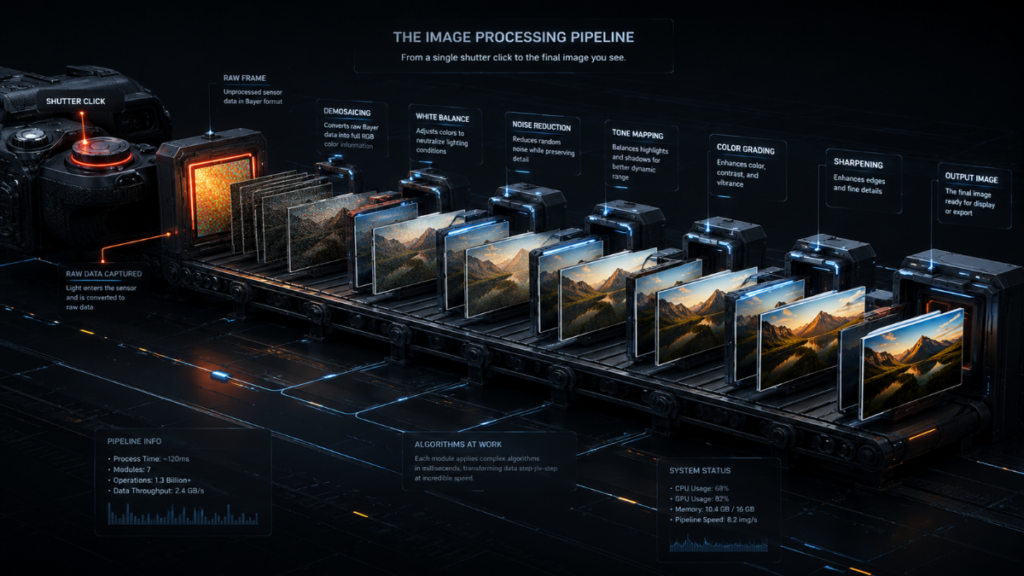
To actively compensate for the heavy physical limitations of microscopic glass lenses, manufacturers must employ aggressive camera image processing steps. The automated system divides the creative workload into multiple independent algorithmic processing tracks.
Capturing multiple frames instead of a single photo
The greatest operational secret of modern mobile photography platforms is the constant reliance on multi-frame photography techniques. The moment you initiate a capture command, the software has already silently captured between five and twelve individual frames at varying exposure thresholds. The underlying system relies on underexposed frames to preserve highlight details and overexposed frames to salvage deep shadow regions.
HDR merging and exposure blending
Automated HDR processing engines immediately align, distort, and stack these independent frames together to create a single image. This intensive automated balancing prevents blue skies from blowing out and prevents dark foliage from turning completely black.
However, this aggressive optimization frequently causes the camera preview vs processed photo output to look synthetic, removing the natural sense of depth present in the live view.
“Aligning digital infrastructure with user expectations shifts the search engine relationship from mechanical optimization to authentic value delivery.”
Luna
AI scene recognition and optimization
Integrated AI photo processing engines continuously analyze active pixel distributions to determine the exact subject matter of your composition. If the network identifies elements like skies, greenery, or family pets, it applies predefined stylistic modifications to the file. Sometimes this heavy algorithmic interference makes the camera preview vs processed photo difference feel like an artificial painting rather than a real memory.
Tone mapping, sharpening and color adjustments
The final phase of standard smartphone image processing involves advanced tone mapping equations to alter localized contrast values. Next, digital sharpening algorithms are applied directly to object outlines to create a false impression of high optical resolution. Colors are heavily driven toward high saturation limits, making the camera preview vs processed photo output deviate significantly from realistic environmental lighting.
Processing Steps and Trade-offs
| Processing Step | Purpose | Possible Side Effect |
| HDR Merge | Recover highlights | Flatter contrast |
| Noise Reduction | Cleaner image | Lost fine textures |
| Sharpening | More detail | Artificial edges |
| Tone Mapping | Balanced brightness | Different mood |
| AI Enhancement | Better exposure | Less realistic colors |
Why Your Final Photo Can Look Completely Different
The stark visual divergence found when analyzing a camera preview vs processed photo is a frequent source of frustration for purists who value realistic documentation. Users who favored older generations of mobile hardware often feel that newer smartphone models present an algorithmic deception rather than an authentic upgrade.
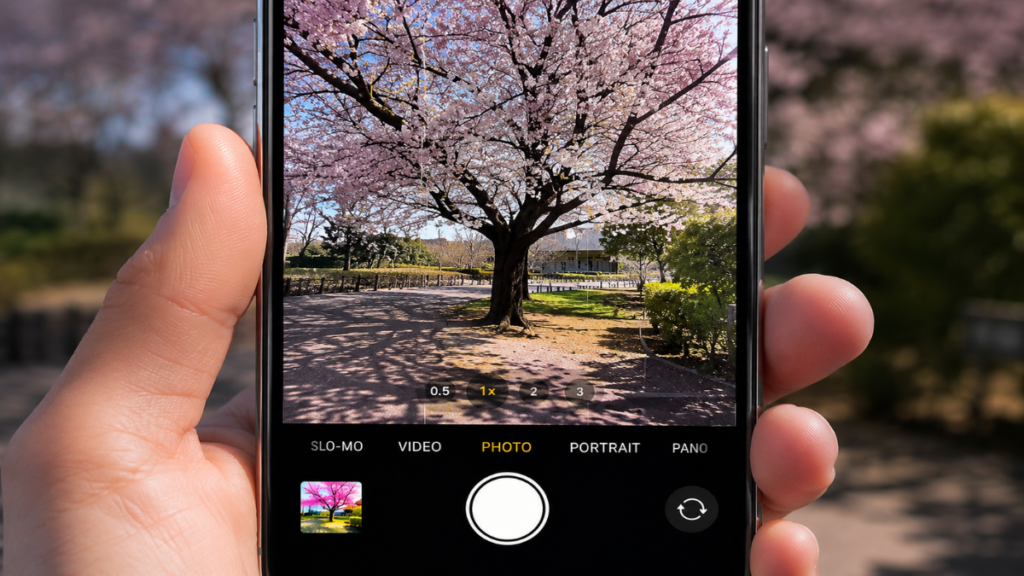
This widespread trend toward forced color shifts, intense desaturation, or heavy smoothing causes notable issues across various specialized fields. When assessing a camera preview vs processed photo side by side, the loss of color precision can render the final image entirely useless for professional documentation.
Brighter shadows than the preview
Dark shadow regions that appeared rich, moody, and artistic on your live preview screen are frequently brightened by automated software rules. The tone mapping software attempts to force visibility into every dark corner, inadvertently destroying the intended contrast ratio you approved during the camera preview stage.
Colors that shift after processing
Severe color inaccuracies occur because AI photo processing pipelines treat every environment with a generic optimization formula. For healthcare professionals capturing medical imagery where tissue tones denote patient health, the fact that the camera preview vs processed photo colors fade or turn pale presents a real obstacle.
Stronger sharpening than expected
When evaluating processed smartphone photos, you will often notice harsh white outlines bordering intricate details like leaves, hair, or animal fur. This digital artifact stems from over-aggressive sharpening passes, causing the final asset to look calculated rather than retaining the organic softness of the camera preview.
Contrast changes that alter the atmosphere
Every unique lighting scenario possesses its own distinct environmental mood. Automatic white balance overrides and computational photography dynamic range expansion can transform a dim twilight scene into a flat look that resembles mid-afternoon. This extreme shift explains why so many users search online to understand why photos look different after taking them.
The Causes of Image Discrepancy
| Change | Why It Happens |
| Brighter image | HDR and exposure fusion |
| Different colors | AI color optimization |
| Stronger detail | Sharpening algorithms |
| Reduced shadows | Tone mapping |
Camera Preview vs Processed Photo in Different Shooting Scenarios
Depending on your immediate physical surroundings, the severity of the camera preview vs processed photo split will shift dramatically. In certain simple environments, the software assists the user, but in complex lighting, it can introduce massive visual errors.
Read more: iPhone Camera vs Adobe Project Indigo: Is Less HDR Actually Better for Natural Photos?
When forced to operate near the operational limits of mobile hardware, automated subroutines run at maximum capacity. This heavy computation can trigger bizarre rendering mistakes when the device misinterprets complex shapes.
More Read
Landscapes
Outdoor environments illuminated by direct sunlight show the greatest variance in the camera preview vs processed photo dynamic. The live preview might present a heavily overexposed sky, but the saved file introduces deep blue tones via highlight restoration. Unfortunately, this process often leaves background greenery looking brittle due to forced computational sharpness.
Portraits
When capturing human subjects, mobile frameworks activate automated skin smoothing routines and artificial skin tone adjustments. This background interference routinely flattens subtle expressions and alters natural melanin tones, leaving the subject looking pale compared to the initial camera preview presentation.
Low-light scenes
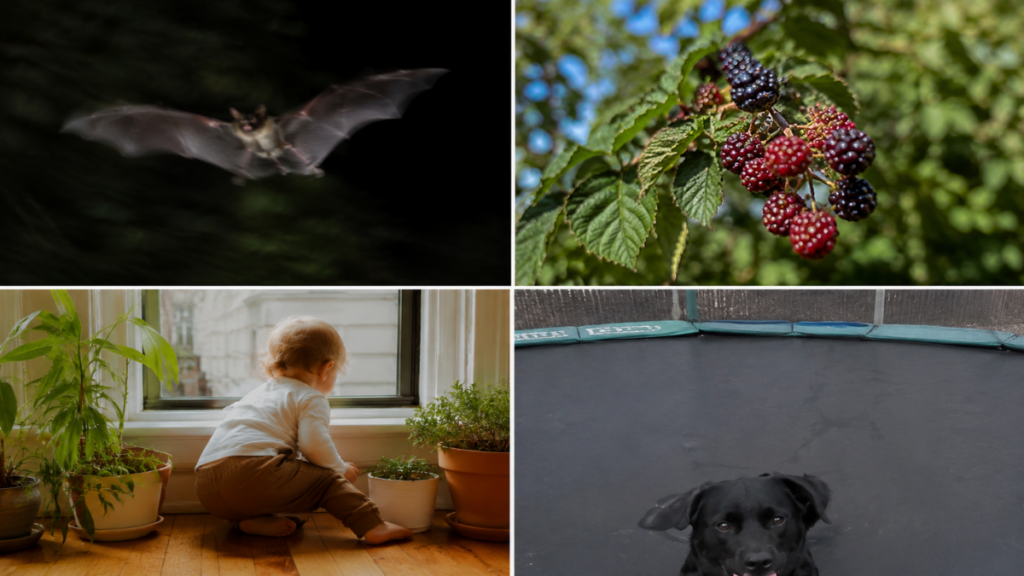
In dark settings, mobile systems apply heavy noise reduction filters to wipe out sensor grain. While this removes digital noise, it simultaneously destroys organic surface textures. Furthermore, the AI can completely misinterpret dark, moving objects—like a flying bat or a black dog on a trampoline—causing them to blur heavily or completely vanish into the background canvas.
Concerts and moving subjects
Photographing live performances with erratic stage lighting is a classic failure point for standard camera image processing. The long exposure times required for multi-frame HDR blending generate severe ghosting artifacts around moving subjects, ensuring the final saved file looks vastly inferior to the fluid real-time camera preview.
Indoor lighting
Indoor spaces lit by mixed illumination sources present a major challenge to automated white balance systems. The device attempts to correct these warm ambient tones toward a sterile, clinical neutral point, completely erasing the cozy atmospheric warmth you observed on the camera preview screen.
Scenario-Specific Anomalies
| Shooting Scenario | Most Noticeable Processing Changes |
| Landscape | HDR, sky recovery |
| Portrait | Skin smoothing, color shifting |
| Night | Noise reduction, exposure lift |
| Concert | Motion blur, ghosting artifacts |
| Indoor | White balance adjustments |
Why Smartphones Process Photos Instead of Showing the RAW Sensor Image
Many frustrated consumers ask why device manufacturers refuse to let users simply save the unadulterated image captured by the physical sensor. The answer is tied directly to the unyielding laws of micro-scale optical engineering.
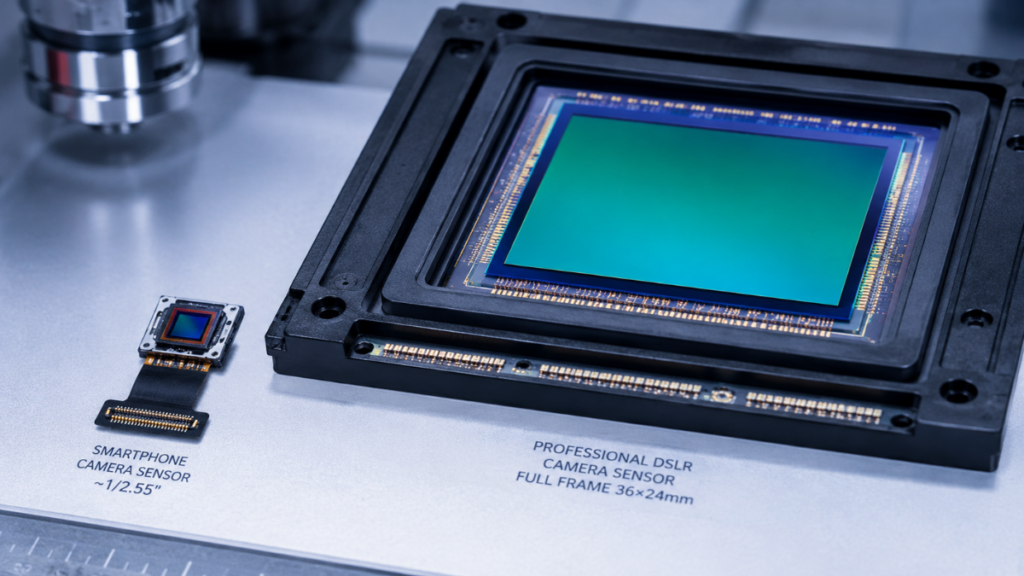
Without automated algorithmic reconstruction, the raw data gathered by a mobile sensor would be practically unusable for everyday applications. Therefore, engineering teams must choose between a noisy, flawed image and a highly processed digital rendering.
Small sensors need computational photography
Mobile phone camera sensors are exponentially smaller than those found inside dedicated professional DSLR setups. Because these tiny components collect very few physical photons, they generate high amounts of digital noise and offer a narrow native dynamic range. Without heavy computational photography, your low-light images would consist of pure black pixels or distorted color grain.
Why manufacturers prioritize consistency over realism
The vast majority of casual consumers desire bright, highly vibrant images that can be instantly shared online without manual post-processing steps. Consequently, mainstream brands design automated pipelines to deliver flat, bright consistency across all environments, choosing to sacrifice absolute color fidelity for consumer convenience.
“The industry pursuit of absolute visual consistency for casual social sharing has systematically degraded color accuracy for specialized applications.”
Luna
The trade-off between technical quality and natural appearance
This engineering approach forces a massive artistic trade-off upon the end user. While you receive a file free of digital grain and overexposed skies, you lose dramatic shadows, true environmental colors, and natural textures. The saved image becomes a standardized computational asset rather than a true reflection of the original camera preview.
Realism vs. Optimization
| Goal | Benefit | Trade-off |
| Cleaner photos | Less digital noise | Loss of fine organic textures |
| Brighter exposure | More visible details | Reduced dramatic atmosphere |
| Better HDR | Wider dynamic range | Flatter overall contrast |
| AI optimization | Instant shareable results | Less predictable color rendering |
Can You Reduce or Avoid Smartphone Photo Processing?
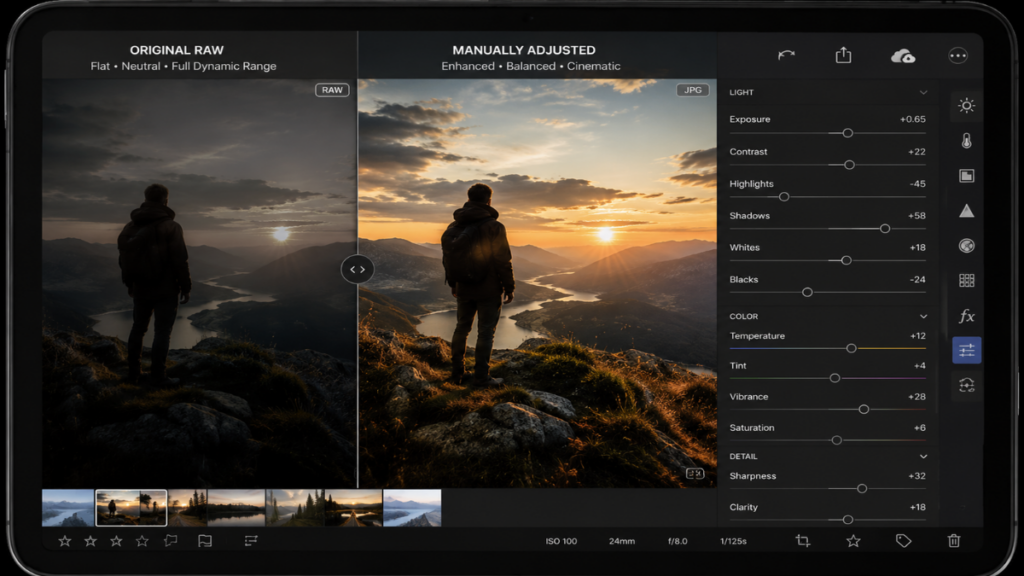
If you prefer to prevent automated operating systems from continuously altering your photography, several advanced workflows can help you reclaim full creative control.
Read more: Google Camera vs iPhone Camera: Which One Produces More Natural Photos?
By modifying how your mobile device captures and stores incoming image data, you can stop automatic filters from permanently altering your pixel structures. This approach requires manual editing effort but provides vastly superior results.
Shooting in RAW
The most effective method to stop automated adjustments is to enable native RAW capture within your advanced application menu. The structural differences between RAW vs JPEG files are immense; RAW files preserve uncompressed sensor data without applying any sharpening or color filters from the processed smartphone photos pipeline. The initial file will appear flat and desaturated, but it provides the perfect raw canvas for manual refinement.
Using third-party camera apps
Specialized third-party camera applications allow users to access raw hardware functions directly while entirely bypassing the default AI subroutines of the native operating system. Many enthusiasts rely on these tools to secure an output that matches the realism of the live camera preview.
Editing instead of relying on automatic processing
Rather than permitting built-in software to estimate and apply color profiles, manually adjusting your files through dedicated editing software like Lightroom or Snapseed yields authentic results. This manual workflow ensures you retain control over fine details and shadow depth according to your personal visual preferences.
Choosing camera settings that minimize processing
Certain mobile brands allow you to tone down software interference within their advanced system menus. Disabling automated scene optimizers and selecting natural color profiles over vibrant presets helps close the massive quality gap between your live camera preview vs processed photo outputs.
Mitigation Methods Effectiveness
| Method | Reduces Processing? | Difficulty Level |
| RAW Capture | High | Medium (Requires Post-processing) |
| Third-party Apps | Medium | Easy (Point and Shoot) |
| Manual Editing | High | Medium (Time-consuming) |
| Default Settings Tweaks | Low | Easy (Set and Forget) |
FAQ
Why does my camera preview look better than the final photo?
The real-time camera preview displays a natural representation of light, preserving genuine depth and optical contrast. The final saved image, however, has undergone heavy alteration through automated sharpening, shadow lifting, and aggressive color adjustments within the smartphone camera processing pipeline.
Can I turn off smartphone image processing?
You cannot completely deactivate these algorithms within native camera applications because the hardware requires software support to overcome physical sensor limitations. However, you can minimize the impact by using third-party tools or capturing in RAW mode.
Does shooting RAW prevent automatic processing?
Yes, utilizing RAW format completely bypasses multi-frame exposure stacking, aggressive noise reduction, and digital sharpening passes, giving you an unaltered file containing pure sensor data for manual post-processing.
Do all smartphones change photos after capture?
Every modern smartphone utilizes computational photography to some degree to optimize image quality. However, each manufacturer implements a unique algorithmic philosophy, with some brands pushing for hyper-vibrant saturation while others try to maintain natural colors.
Conclusion
The stark visual split observed between a camera preview vs processed photo remains an inevitable reality of modern mobile digital photography. While automated algorithms offer quick convenience for everyday users, they frequently compromise color fidelity and contrast depth for technical documentation. Understanding these internal processing steps allows you to implement alternative capture methods to retain complete creative control over your final images.
LEAVE A COMMENT TO GET FREE EXPERT CONSULTATION OR FOLLOW OUR WEBSITE THE COUCH INSIDER TO UPDATE THE LATEST KNOWLEDGE.